
- Wurlitzer
- 200 Series Replacement Speakers
200 Series Replacement Speakers
200 Series Replacement Speakers
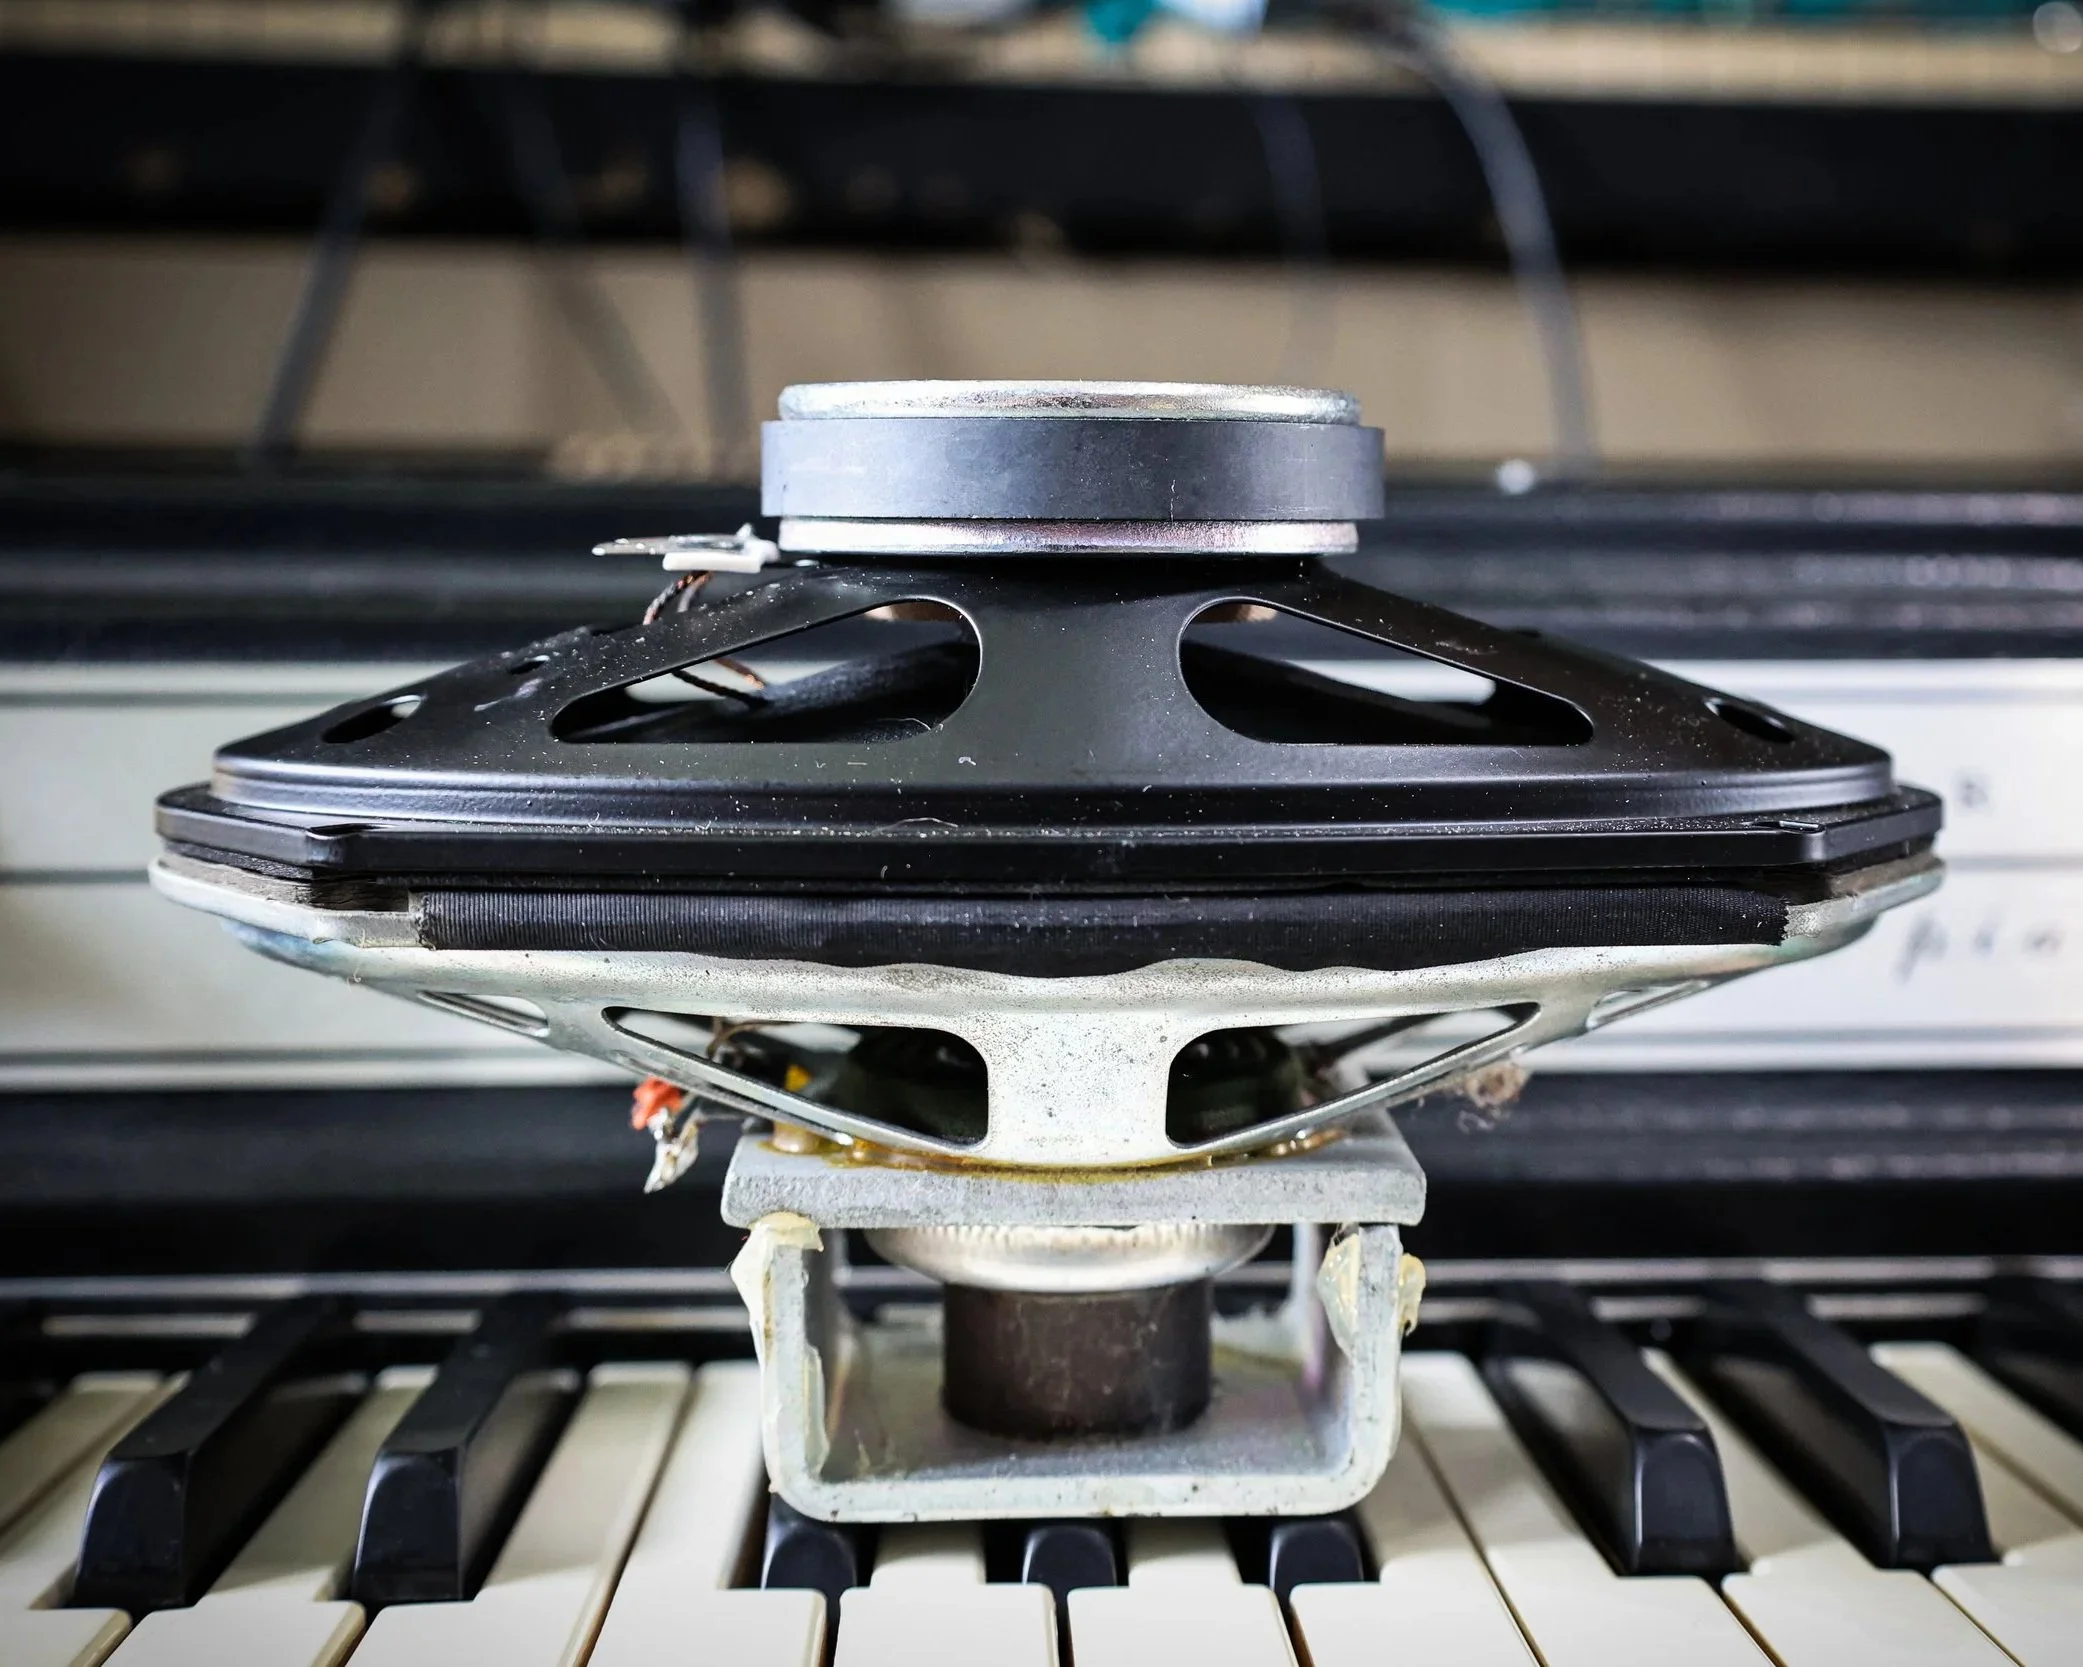
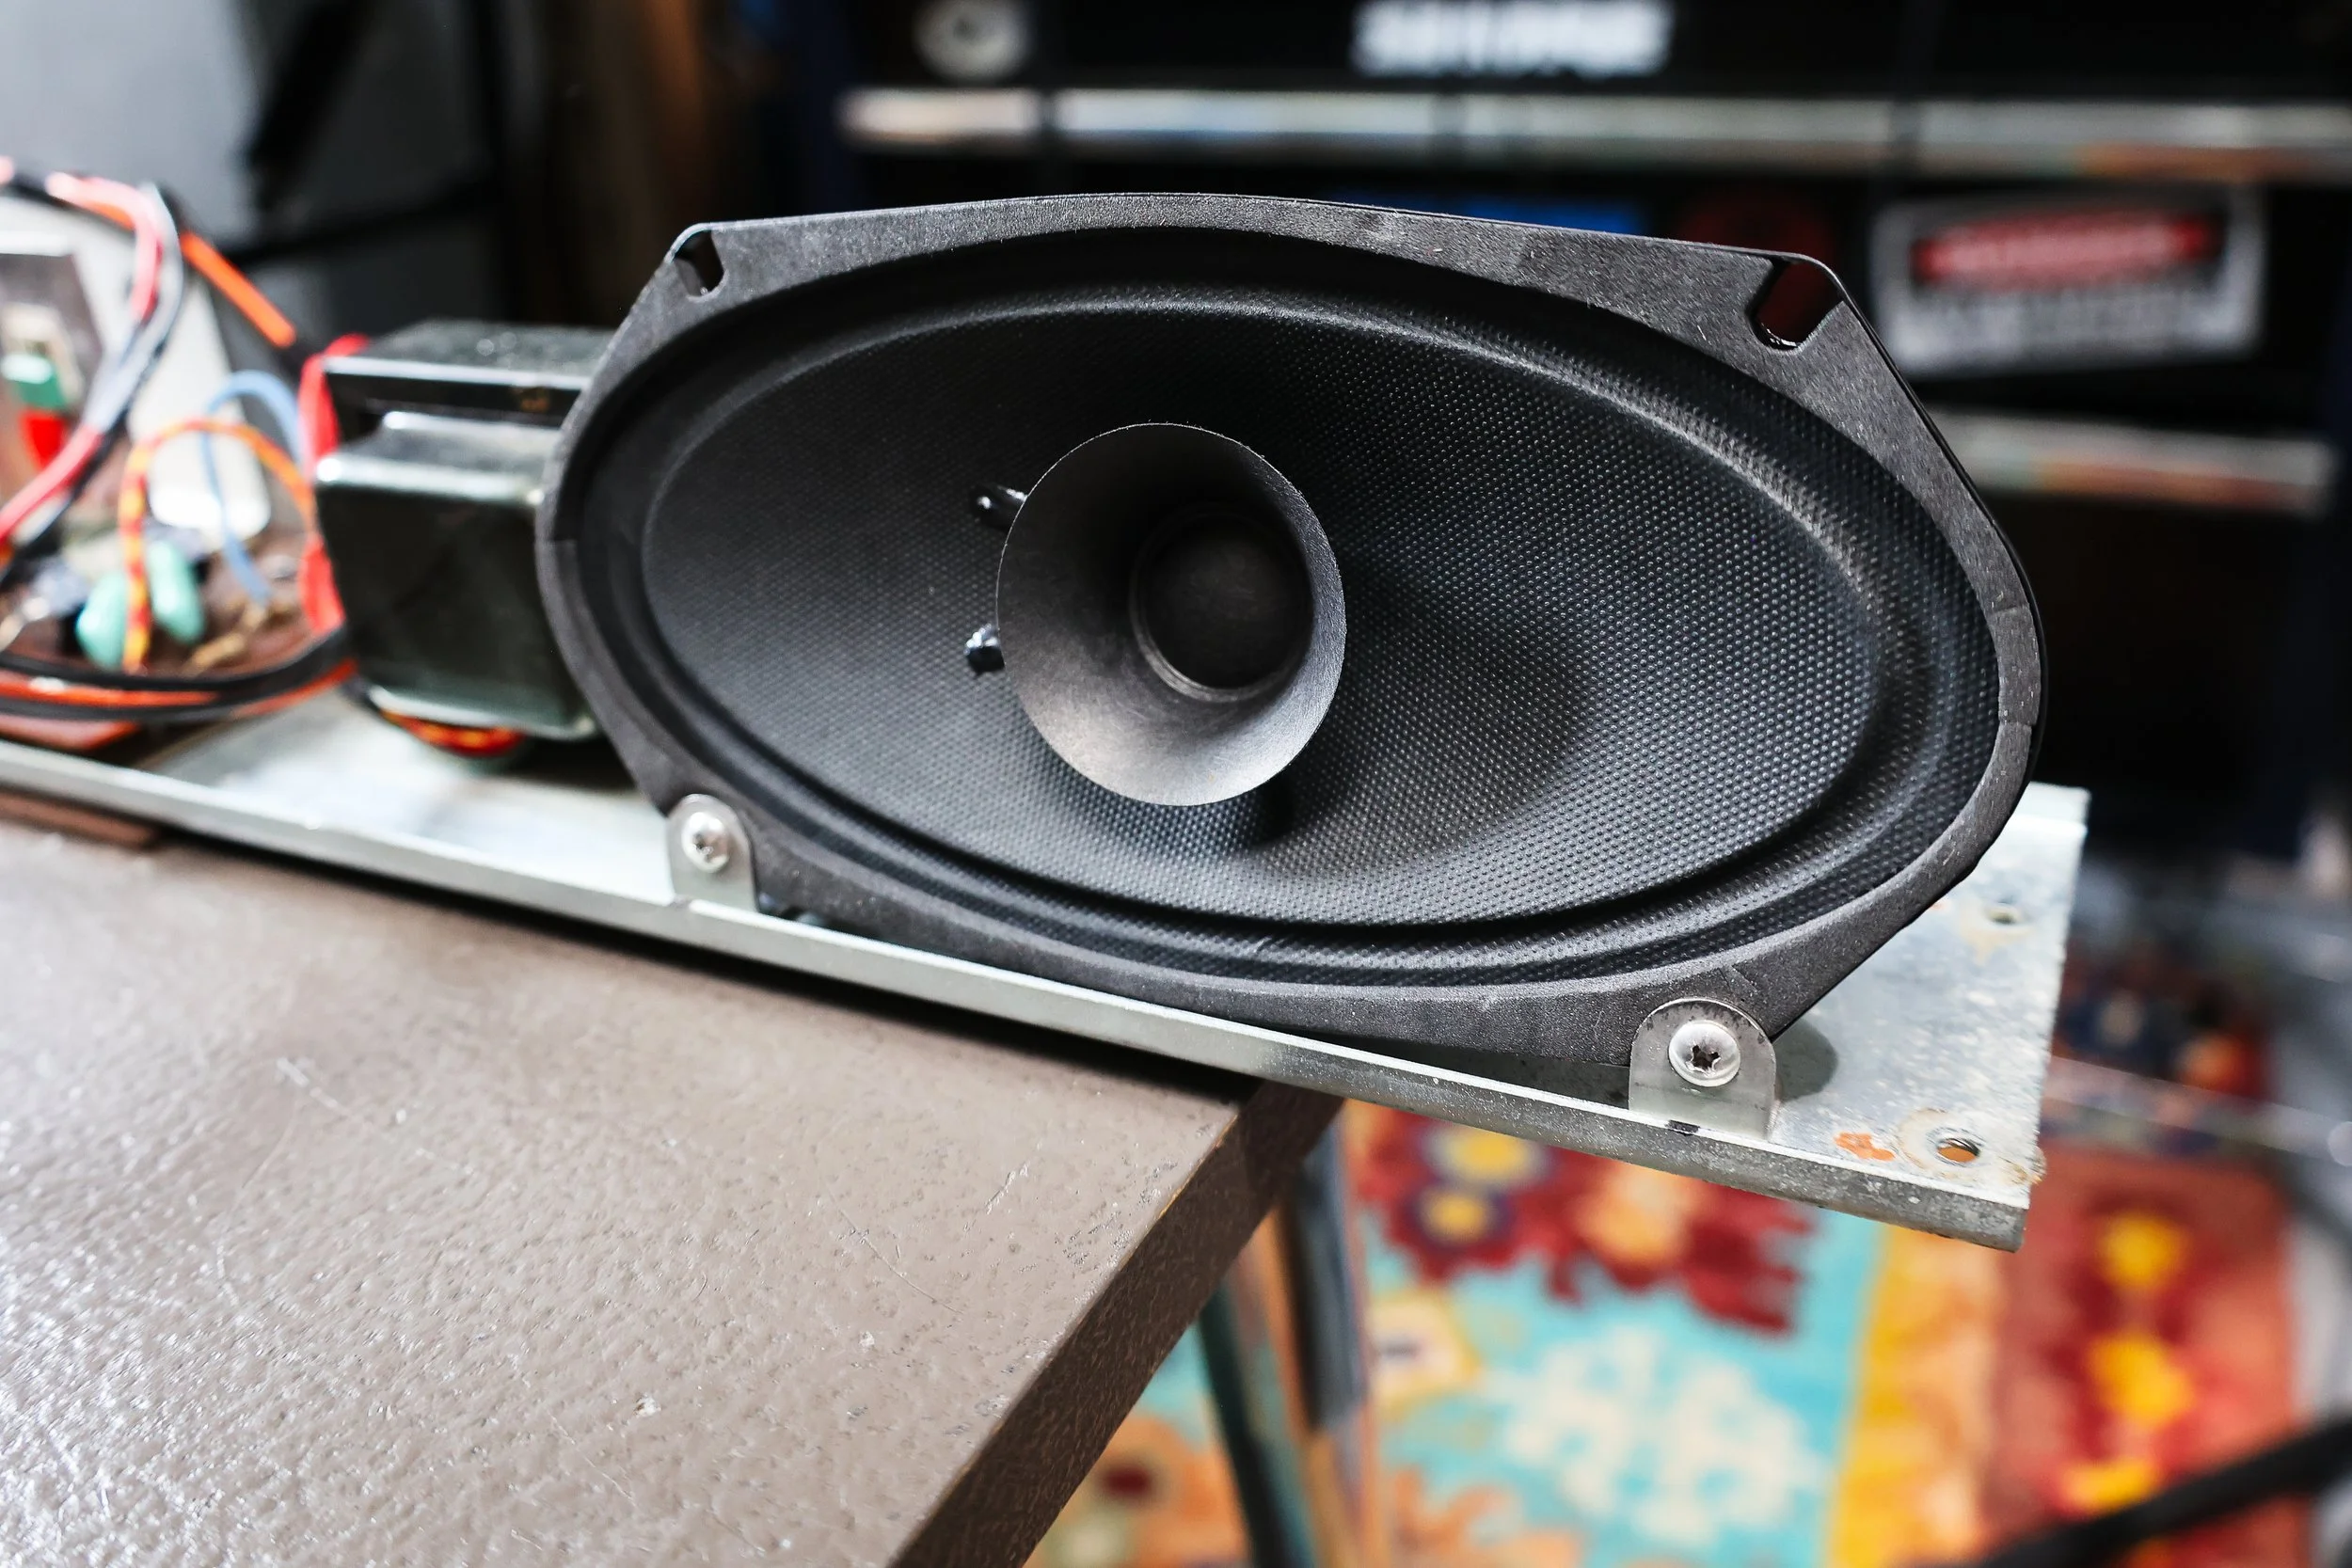
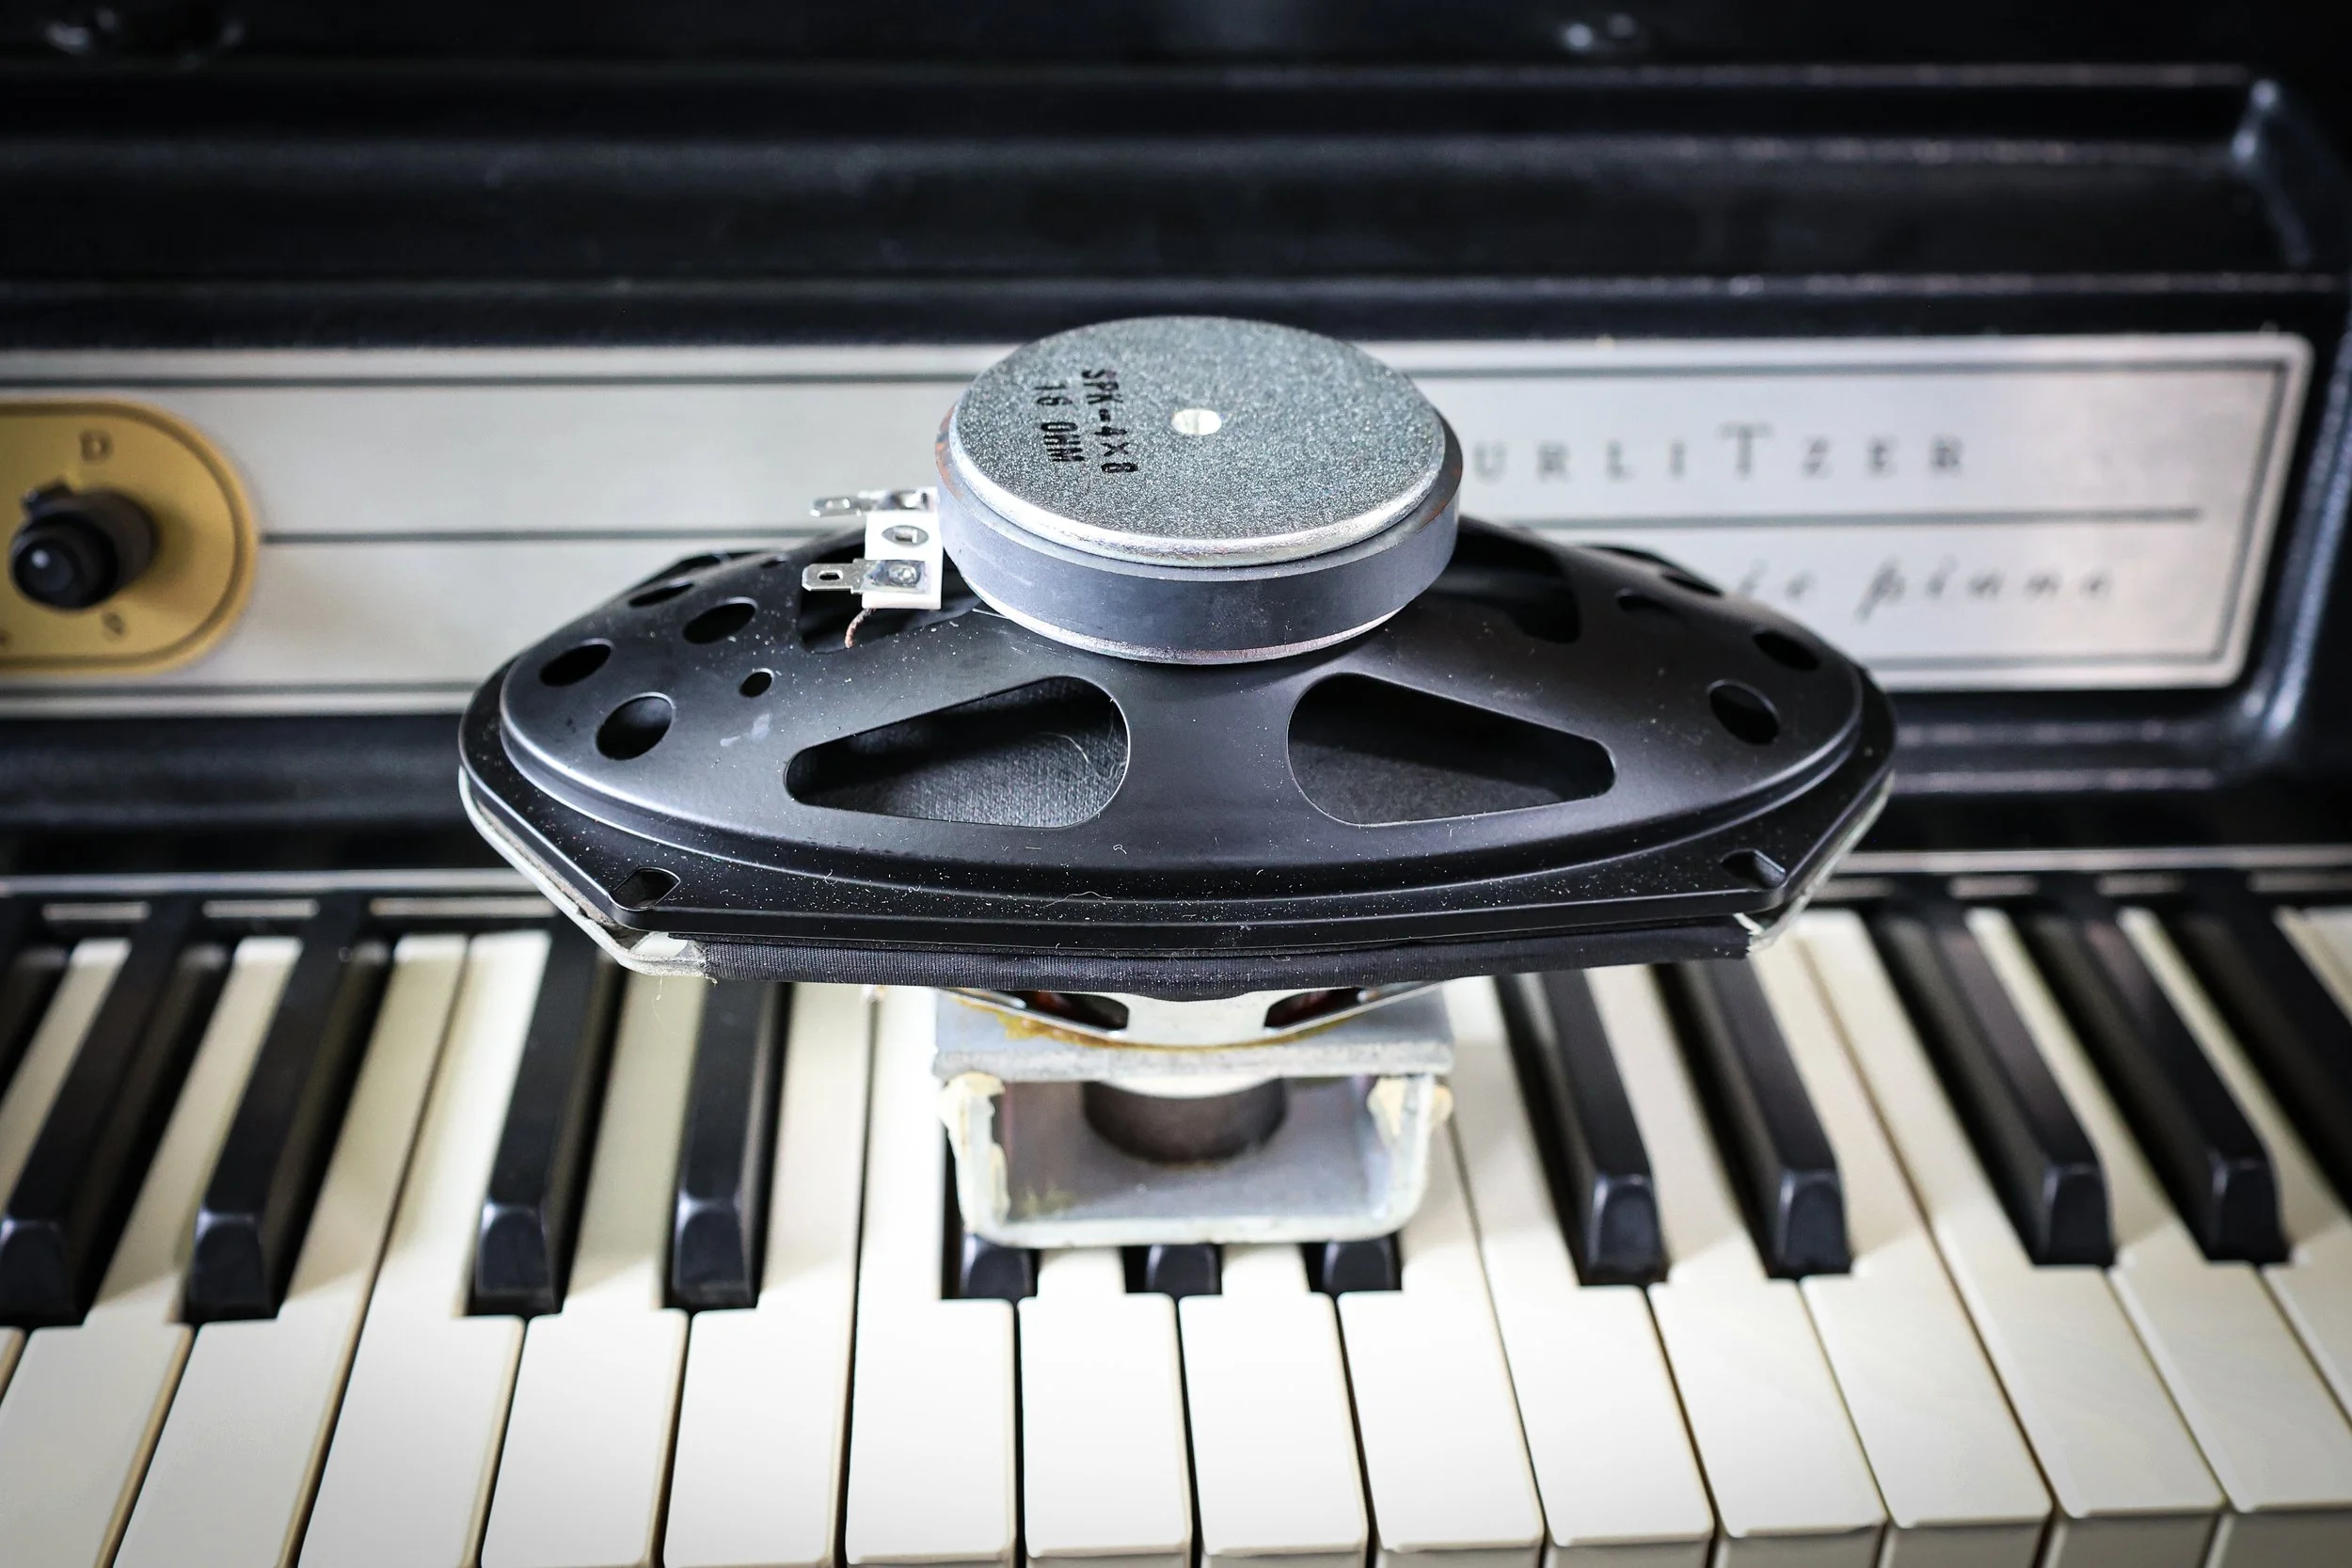
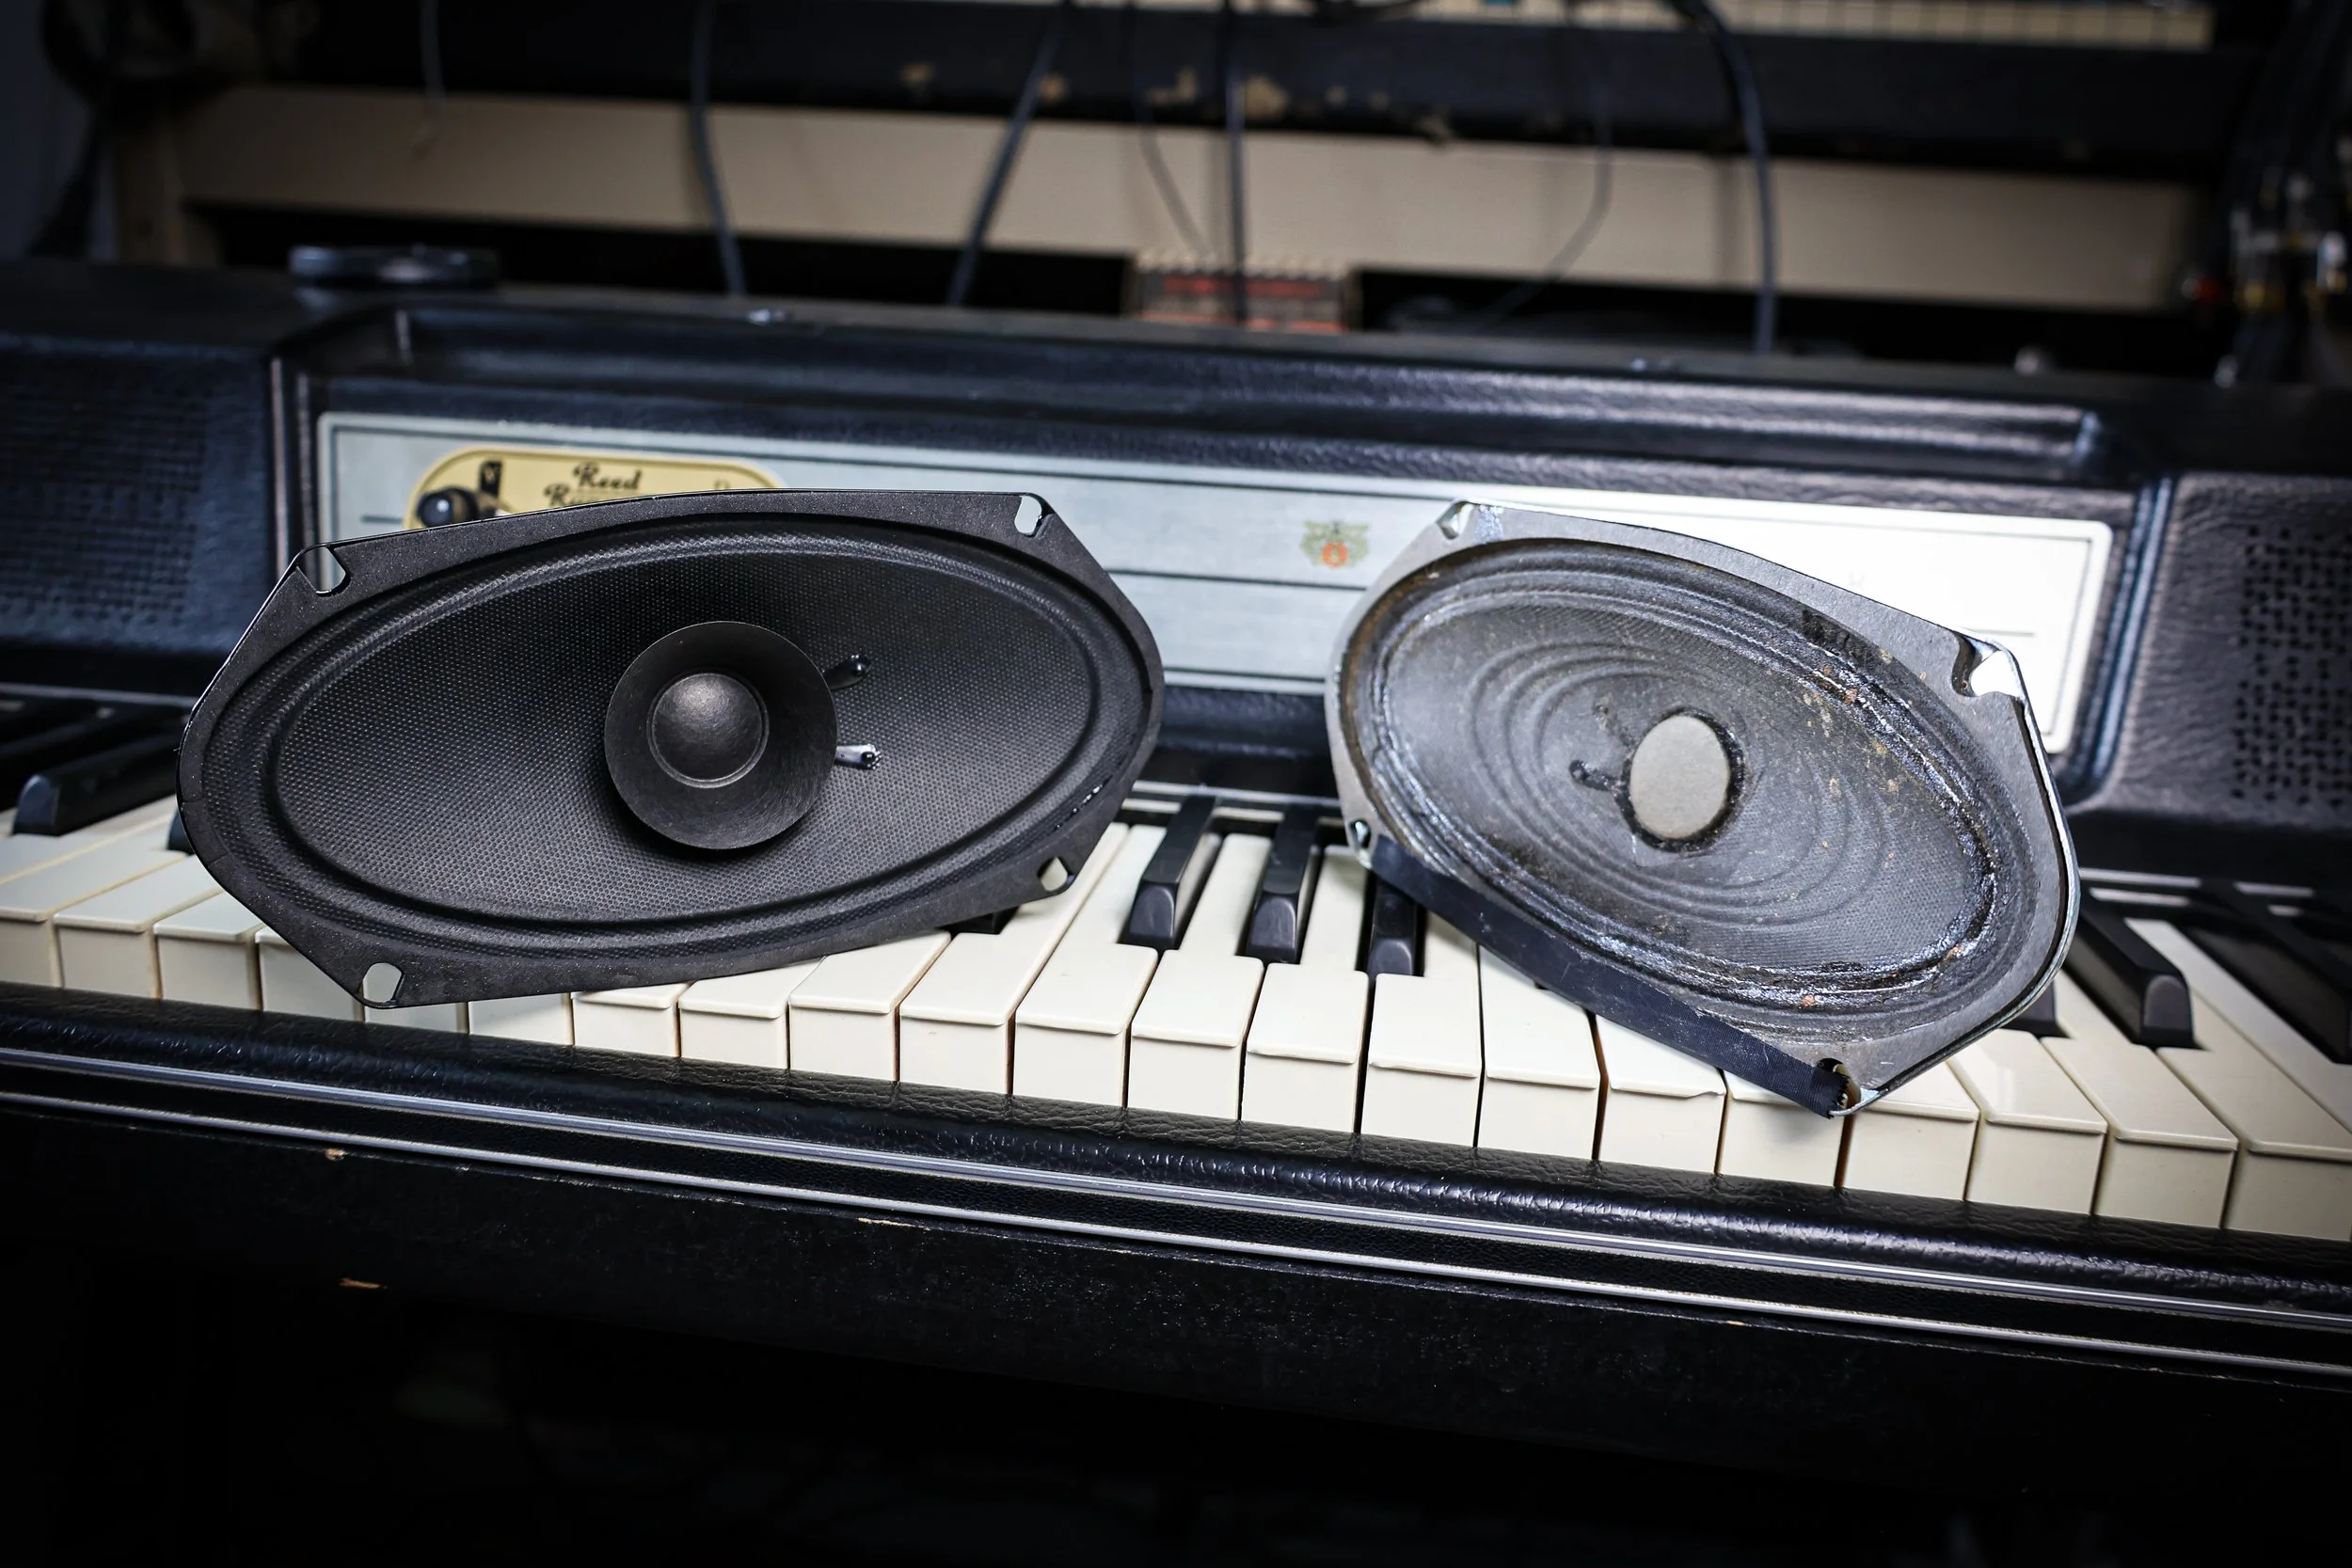
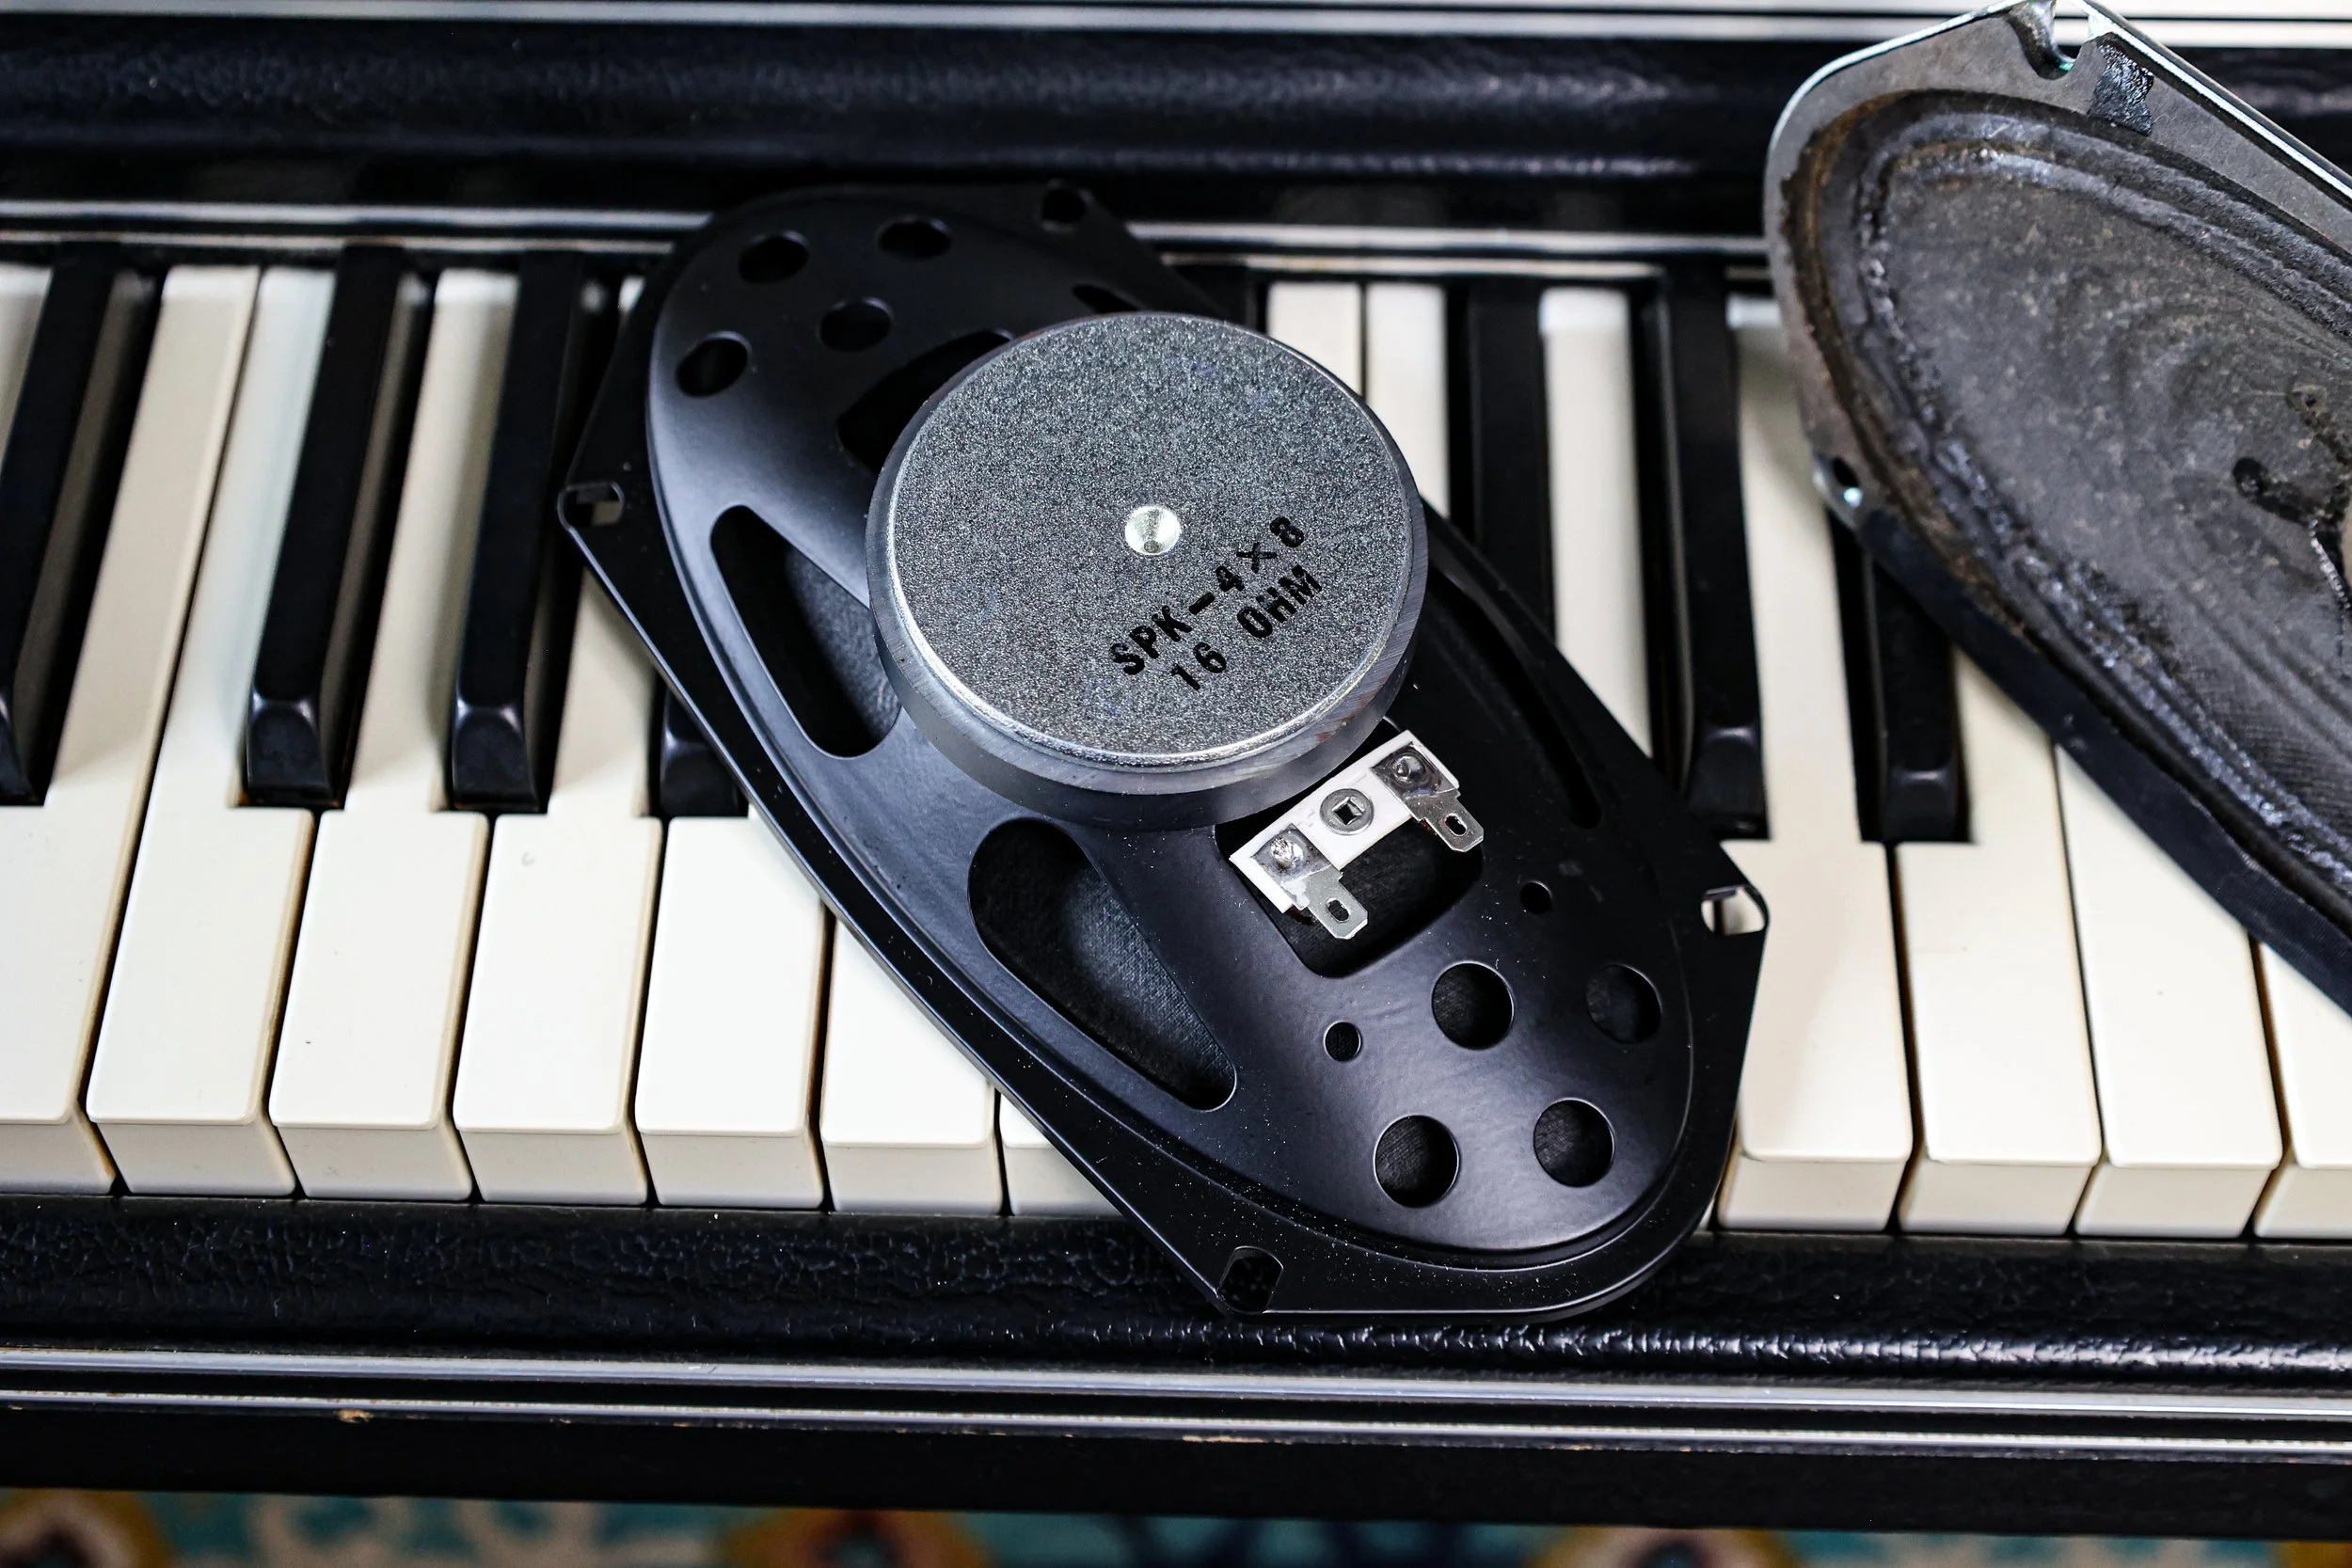
These speakers are not only a good fit, they’re also a solid sound-a-like to the original 200 series speakers. Some might say they even sound a bit more full and detailed. But you might not sound your best after 50 years either - I know I don’t. So rather than hope that some ancient speaker parts warehouse is uncovered - we’re offering this quite good modern equivalent for 200 and 200A Wurlitzer EPs.
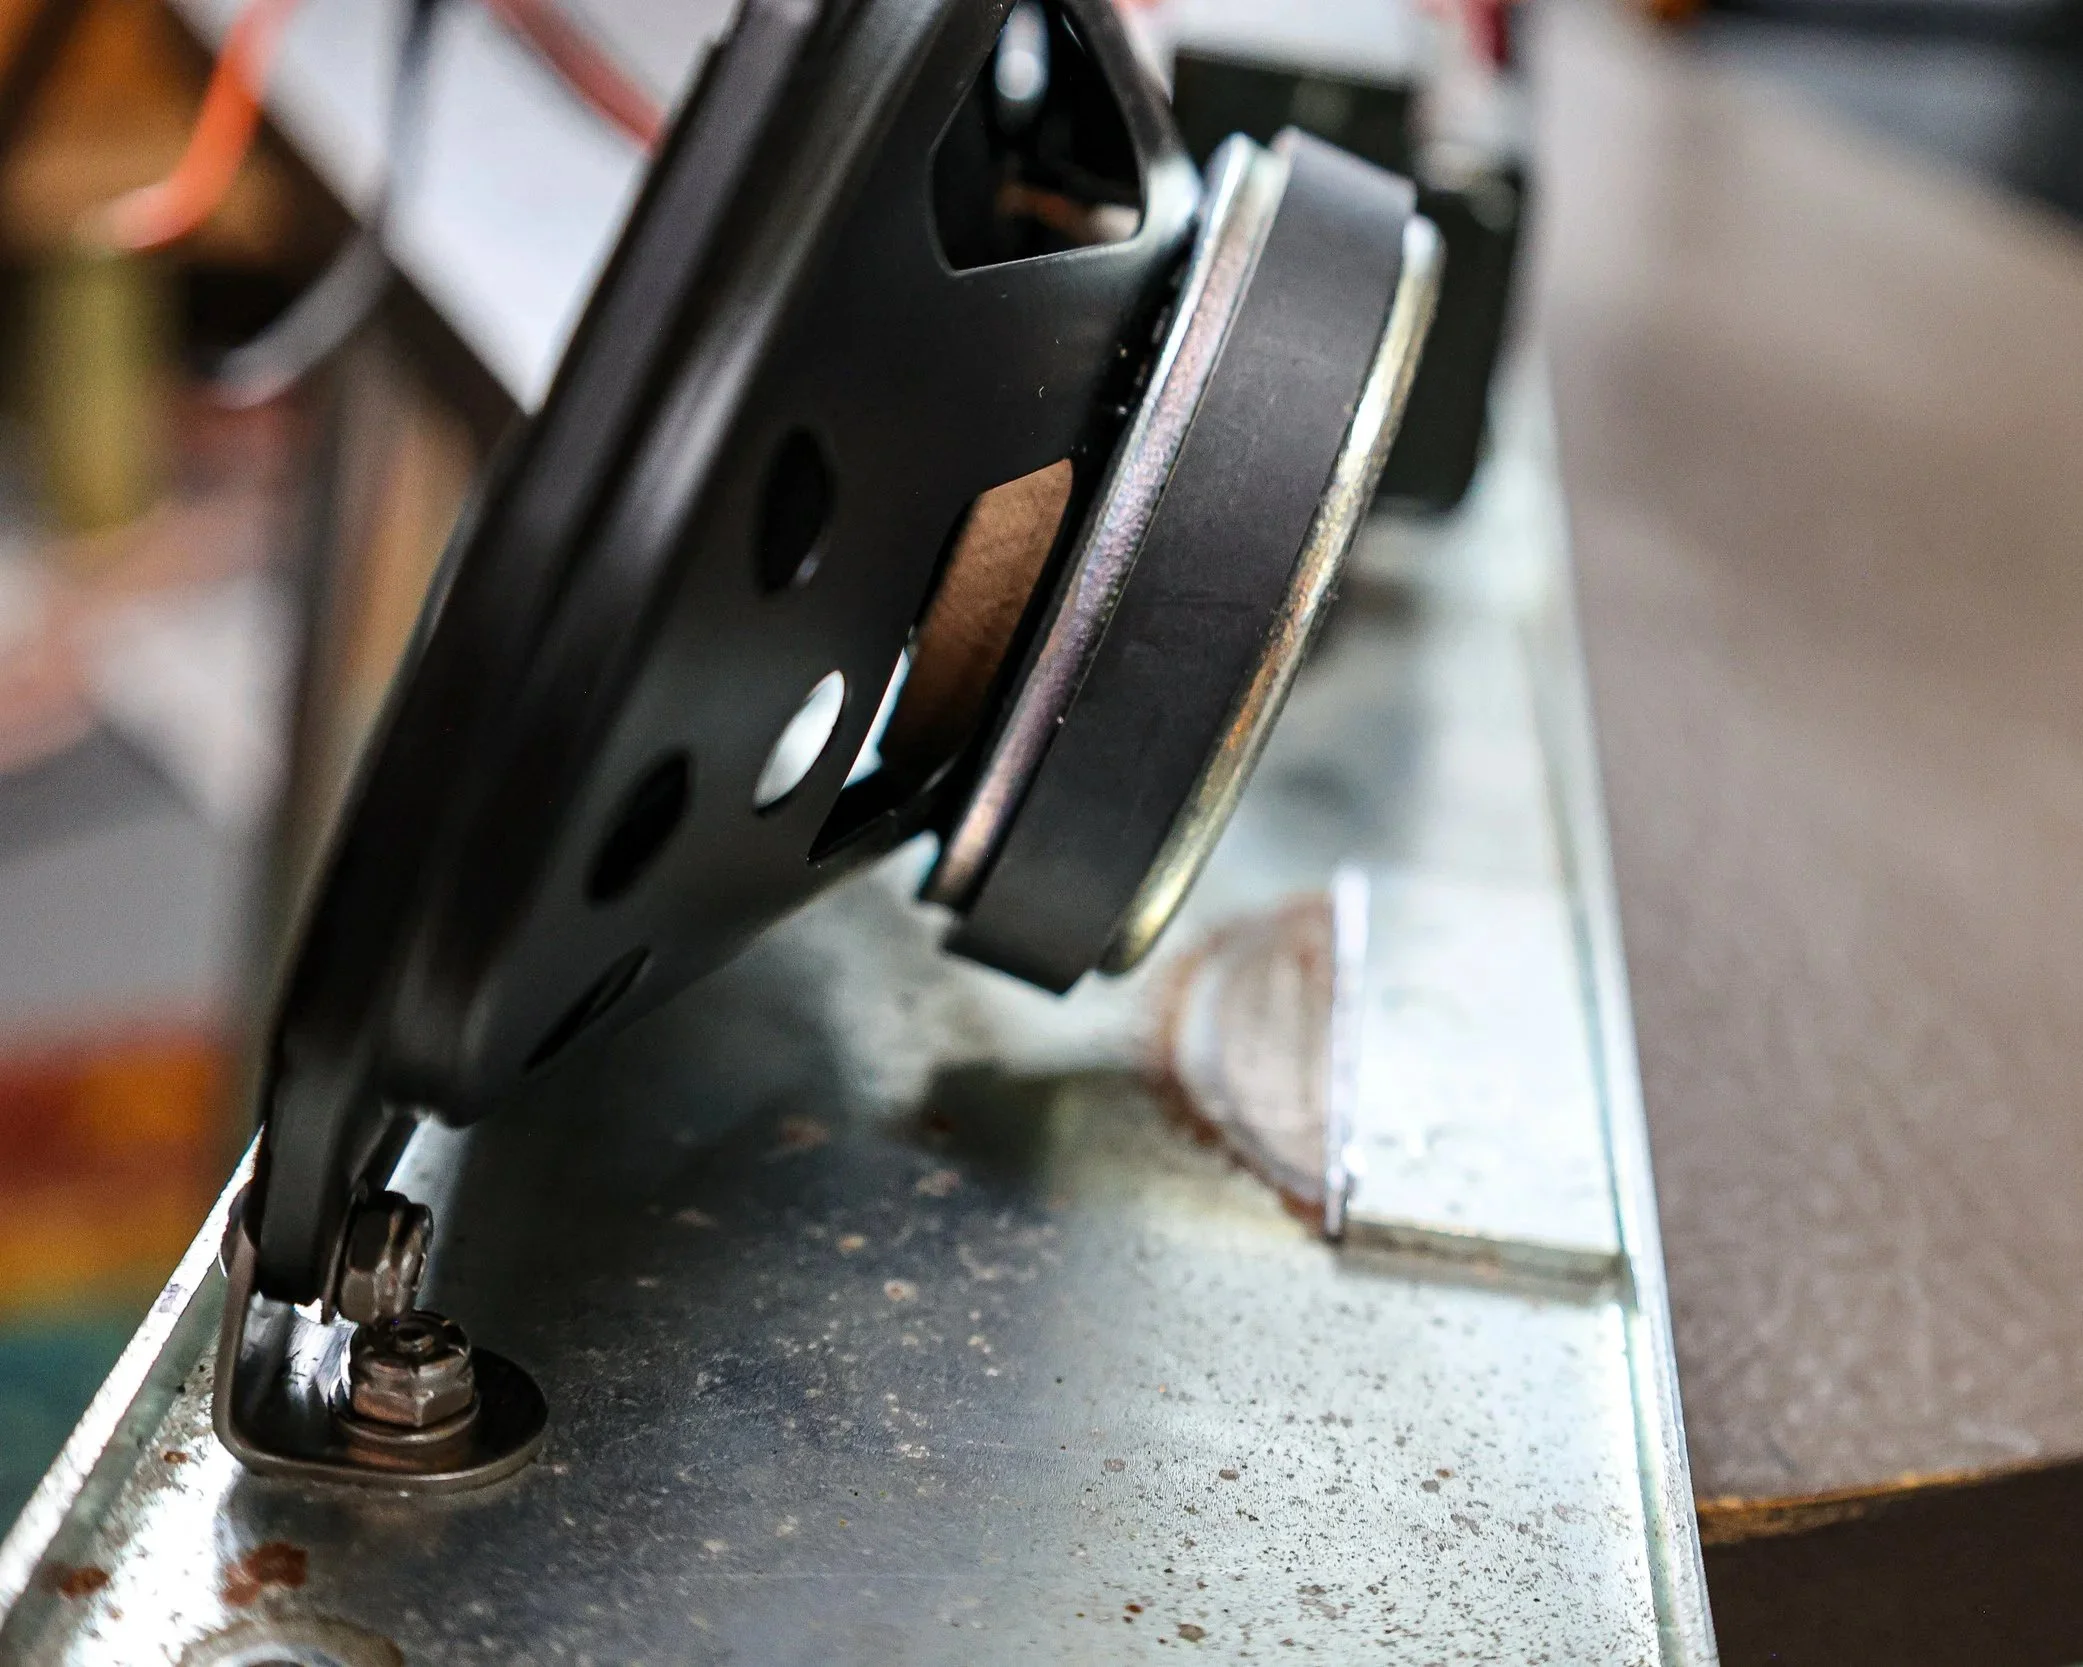
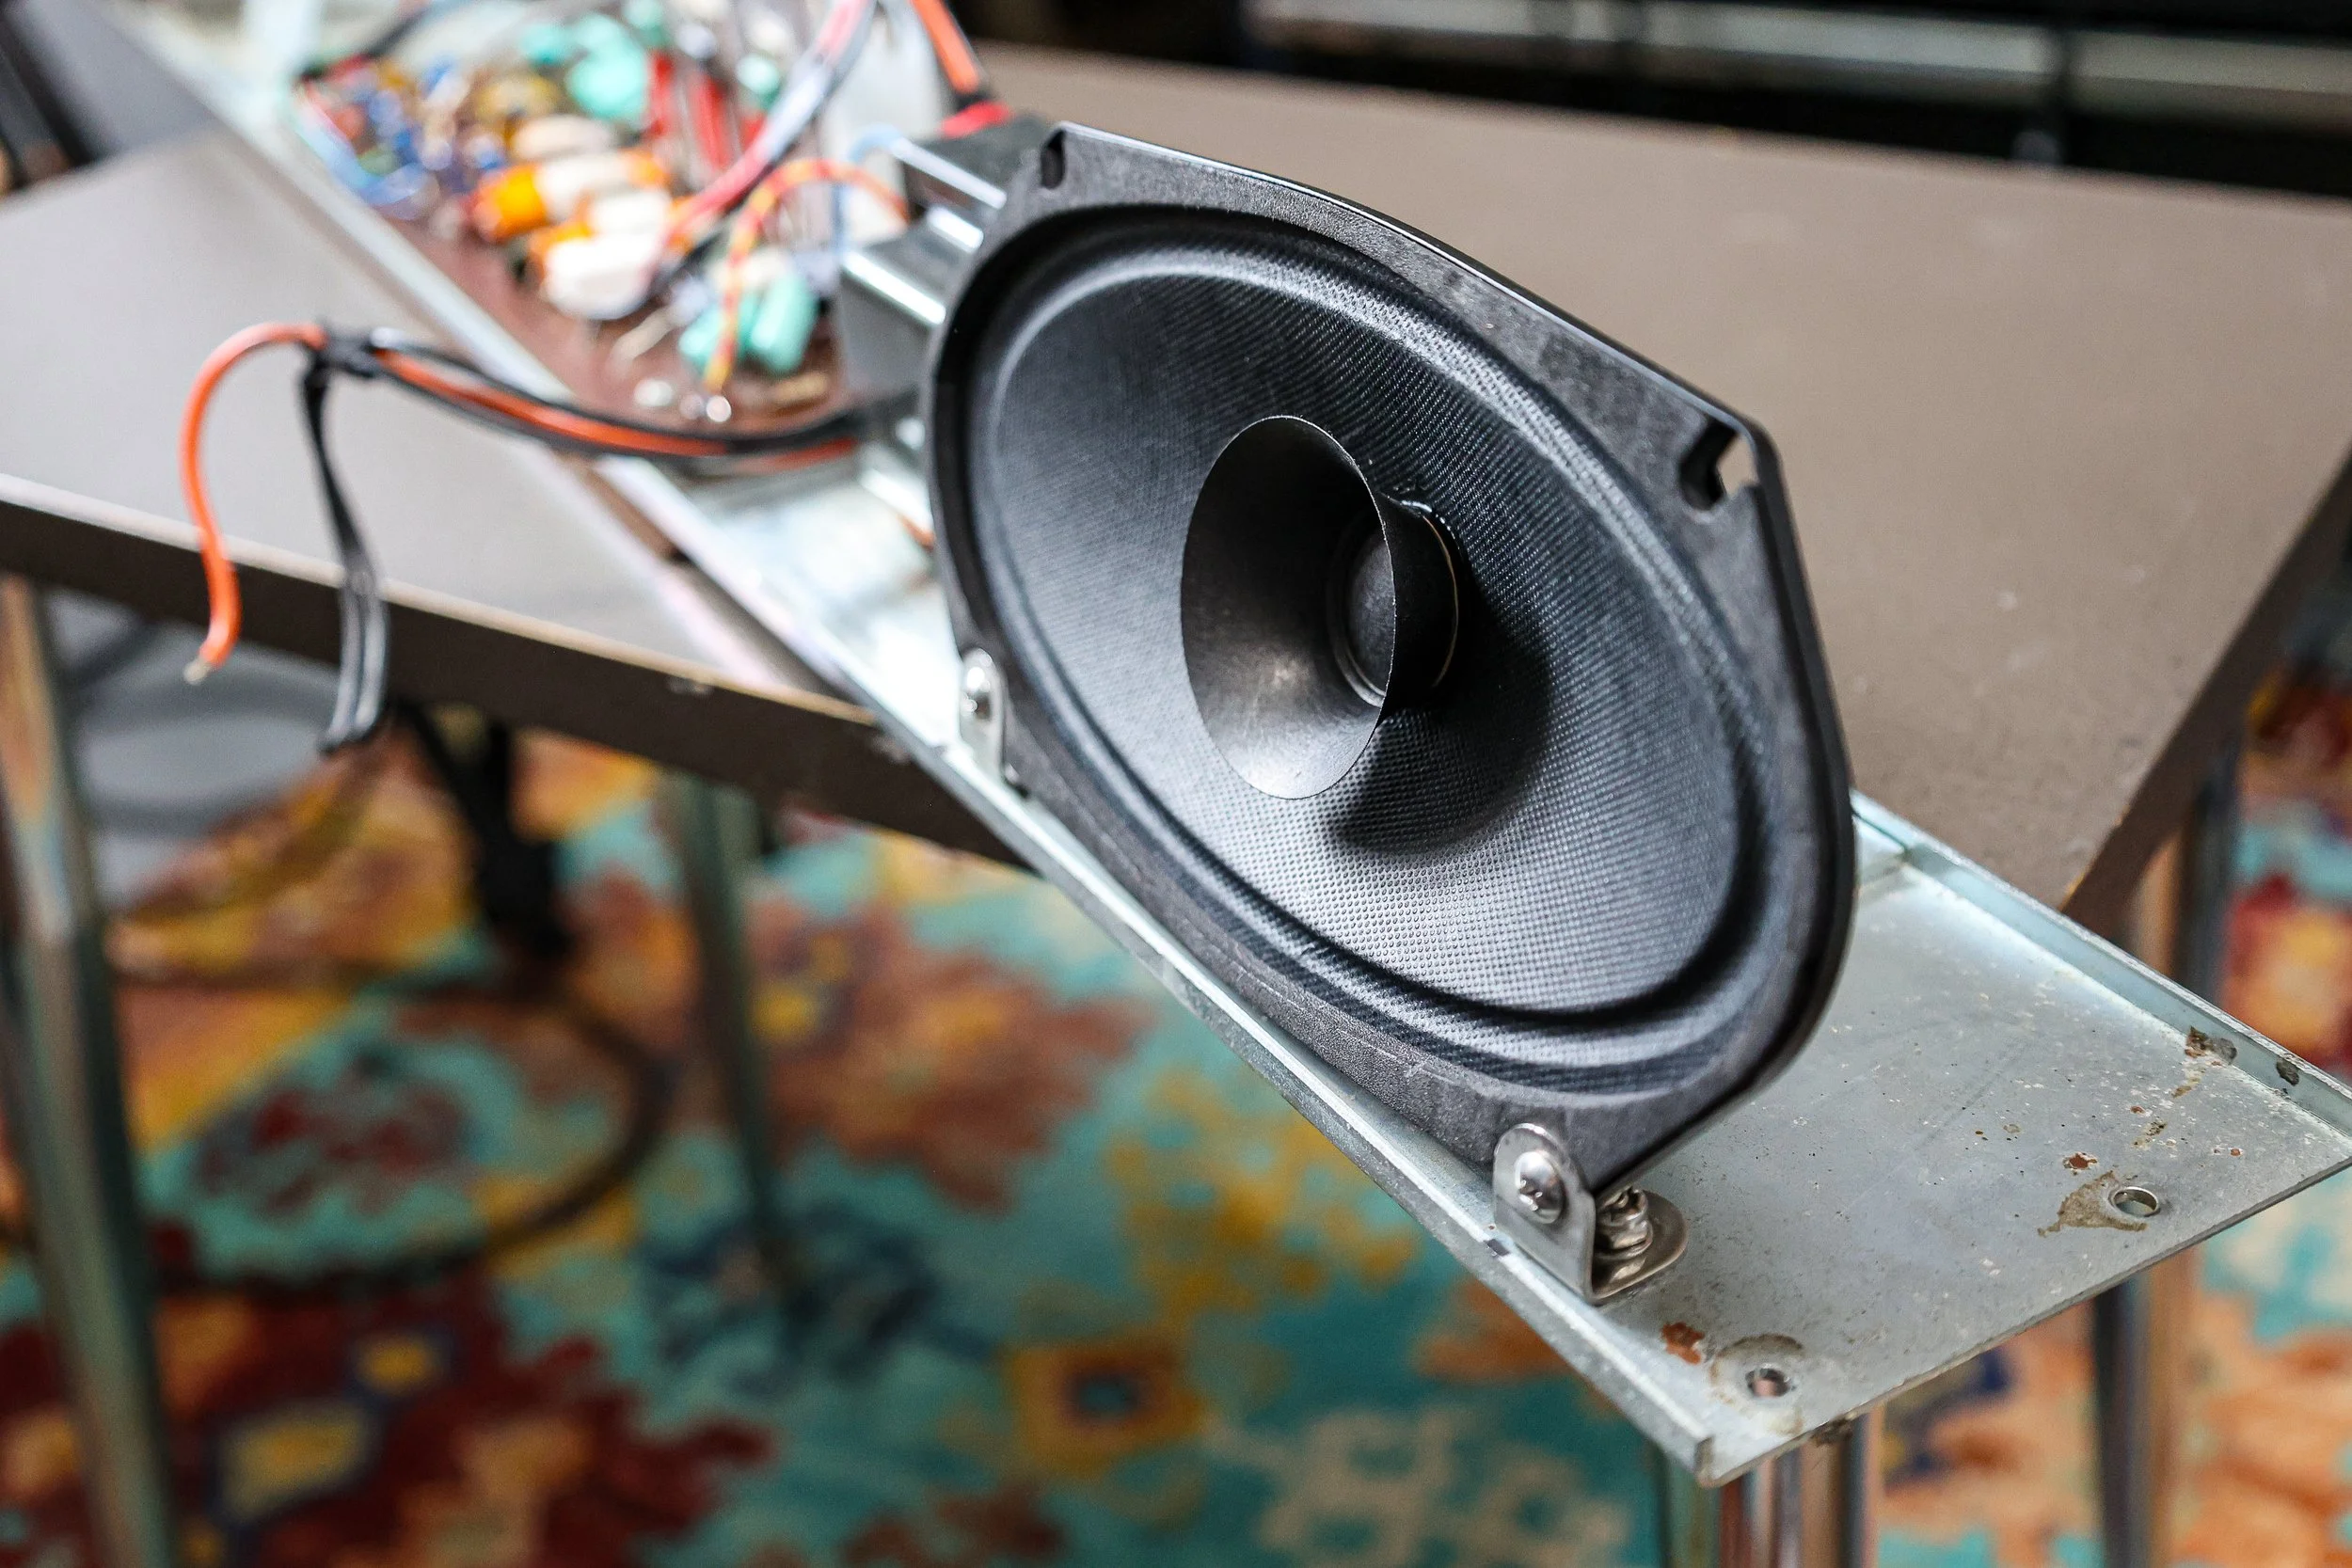
Mounting: They will mount on both lid and rail. For the lid you can reuse the original rosette screws and we may have a replacement for those sooner or later as well. You also may want to trim the inner cone a little for lid mounting to ensure it doesn’t rub. Rail mounting is a change and requires removing part or all of the original speaker bracket and then installing the included angle brackets. Rail Mounting Instructions can be found at the bottom of this listing.
Also, relating to the Reed Runner and its stereo operation, we’re offering these speakers in 16ohm and 8ohm. So that if you should choose to run a stereo amplifier like the Reed Runner you can run each channel at 8 ohm and thus get a little more power and volume out of the same amplifier. The original speakers will be 16ohm and we do recommend that impedance if you’re going to continue mono amplification run in parallel as done by Wurlitzer.
Both original and new speakers have the positive connector marked - mind your polarity! As always, let us know if you have any questions.
For rail mounting:
Mark the position of the speakers before removal to help in centering.
Remove the nuts and top plate from the speaker housing (this is sometimes glued in place)
Remove the bolts and then speaker.
Shorten or remove the remaining bracket that is spot welded/glued to the rail - we typically use a grinder with a cutting wheel, some people will successfully separate them at the weld. Mainly be careful of debris and existing components in proximity. The original Isofon speakers have not been available for a long time and this will enable alternative mounting without interference.
Mark a spacing of approximately 5-1/2” with the bracket about 1/8” away from the lip of the rail.
Give your angle brackets a slight bend either by wrenching on them or delicately smashing them.
Drill your holes and insert the machine screw from the underside of the rail to affix the angle bracket.
Install the speaker behind the bracket to ensure plenty of clearance.
Hook the speakers back up.
Jam out with or without your clam out. It’s always an option. (local laws may contradict this advice)
These speakers are not only a good fit, they’re also a solid sound-a-like to the original 200 series speakers. Some might say they even sound a bit more full and detailed. But you might not sound your best after 50 years either - I know I don’t. So rather than hope that some ancient speaker parts warehouse is uncovered - we’re offering this quite good modern equivalent for 200 and 200A Wurlitzer EPs.
Mounting: They will mount on both lid and rail. For the lid you can reuse the original rosette screws and we may have a replacement for those sooner or later as well. You also may want to trim the inner cone a little for lid mounting to ensure it doesn’t rub. Rail mounting is a change and requires removing part or all of the original speaker bracket and then installing the included angle brackets. Rail Mounting Instructions can be found at the bottom of this listing.
Also, relating to the Reed Runner and its stereo operation, we’re offering these speakers in 16ohm and 8ohm. So that if you should choose to run a stereo amplifier like the Reed Runner you can run each channel at 8 ohm and thus get a little more power and volume out of the same amplifier. The original speakers will be 16ohm and we do recommend that impedance if you’re going to continue mono amplification run in parallel as done by Wurlitzer.
Both original and new speakers have the positive connector marked - mind your polarity! As always, let us know if you have any questions.
For rail mounting:
Mark the position of the speakers before removal to help in centering.
Remove the nuts and top plate from the speaker housing (this is sometimes glued in place)
Remove the bolts and then speaker.
Shorten or remove the remaining bracket that is spot welded/glued to the rail - we typically use a grinder with a cutting wheel, some people will successfully separate them at the weld. Mainly be careful of debris and existing components in proximity. The original Isofon speakers have not been available for a long time and this will enable alternative mounting without interference.
Mark a spacing of approximately 5-1/2” with the bracket about 1/8” away from the lip of the rail.
Give your angle brackets a slight bend either by wrenching on them or delicately smashing them.
Drill your holes and insert the machine screw from the underside of the rail to affix the angle bracket.
Install the speaker behind the bracket to ensure plenty of clearance.
Hook the speakers back up.
Jam out with or without your clam out. It’s always an option. (local laws may contradict this advice)